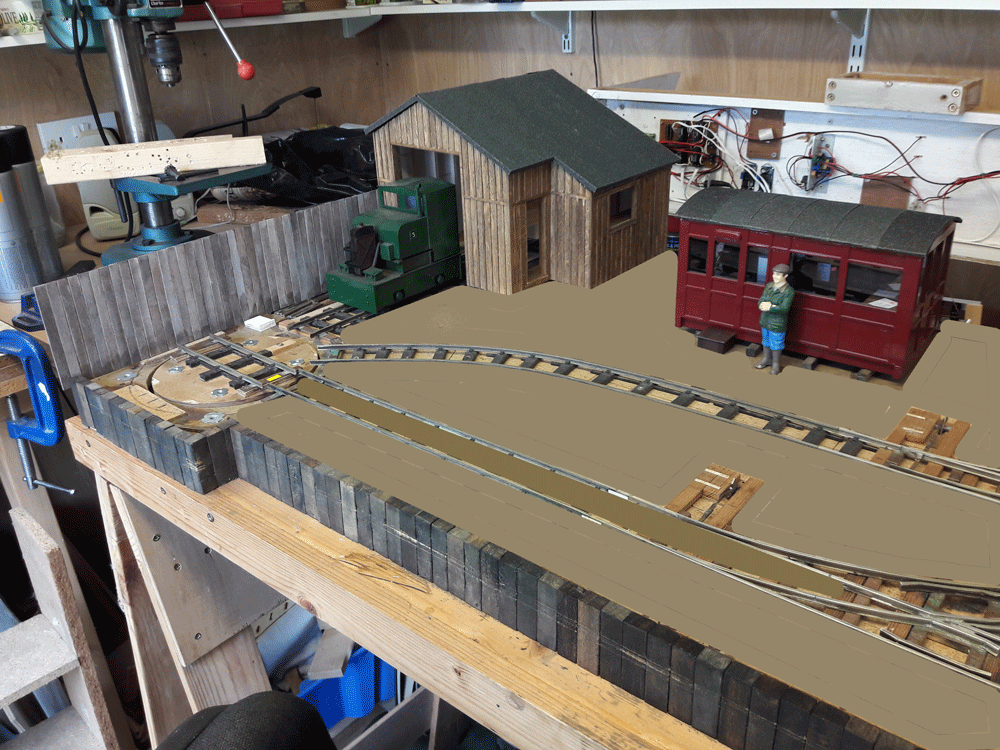
Engine shed
Historical
|
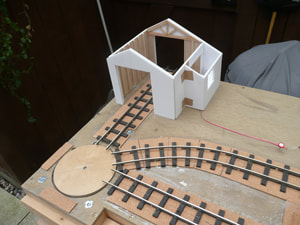
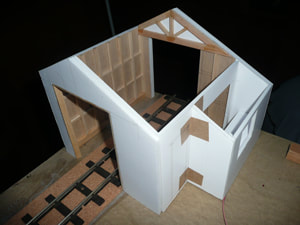
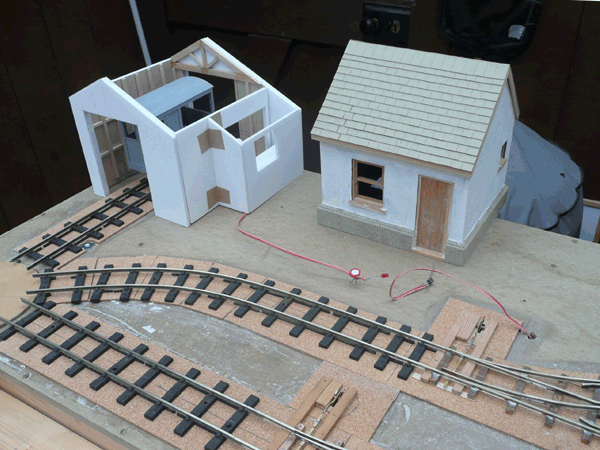
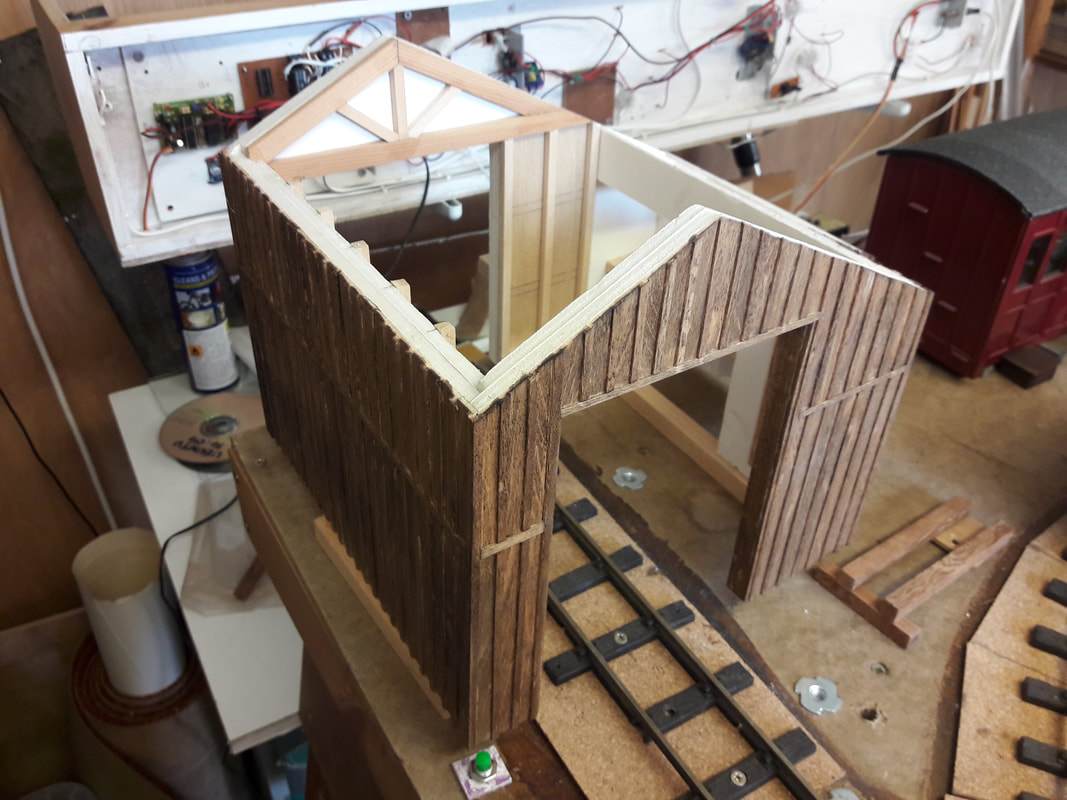
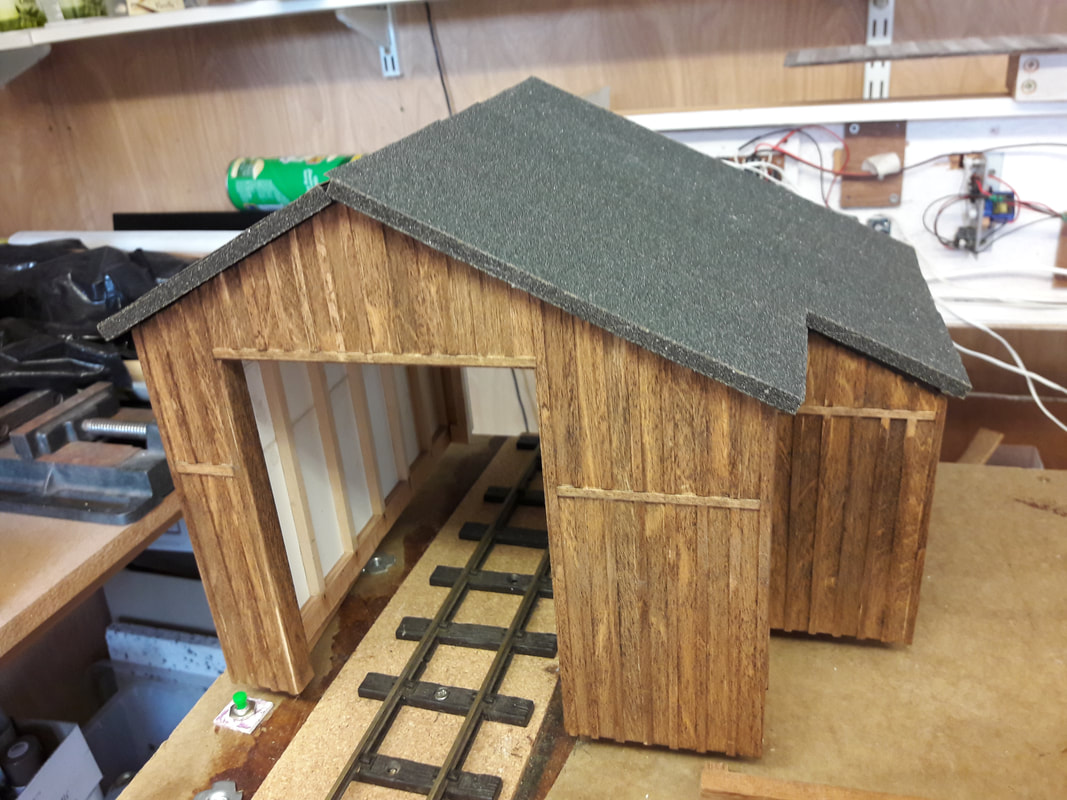
The engine shed was constructed with double thicknesses of 5mm foam board. Mock timber beams and wall panelling was added. A small area for a work bench was also added. The back wall has a hole on the edge of the baseboard so that if a board were added at the rear to provide a fiddleyard, engines could also be swapped through the engine shed as well.
|
A space was left beside the engine shed for an office and a small ex-coal merchants office was made based on a photo. However, it didn't seem appropriate for the layout and two other options based on redundant coaches were considered. In the end, the ex-4-wheel observation coach was chosen. See Office.
|
Revival
|
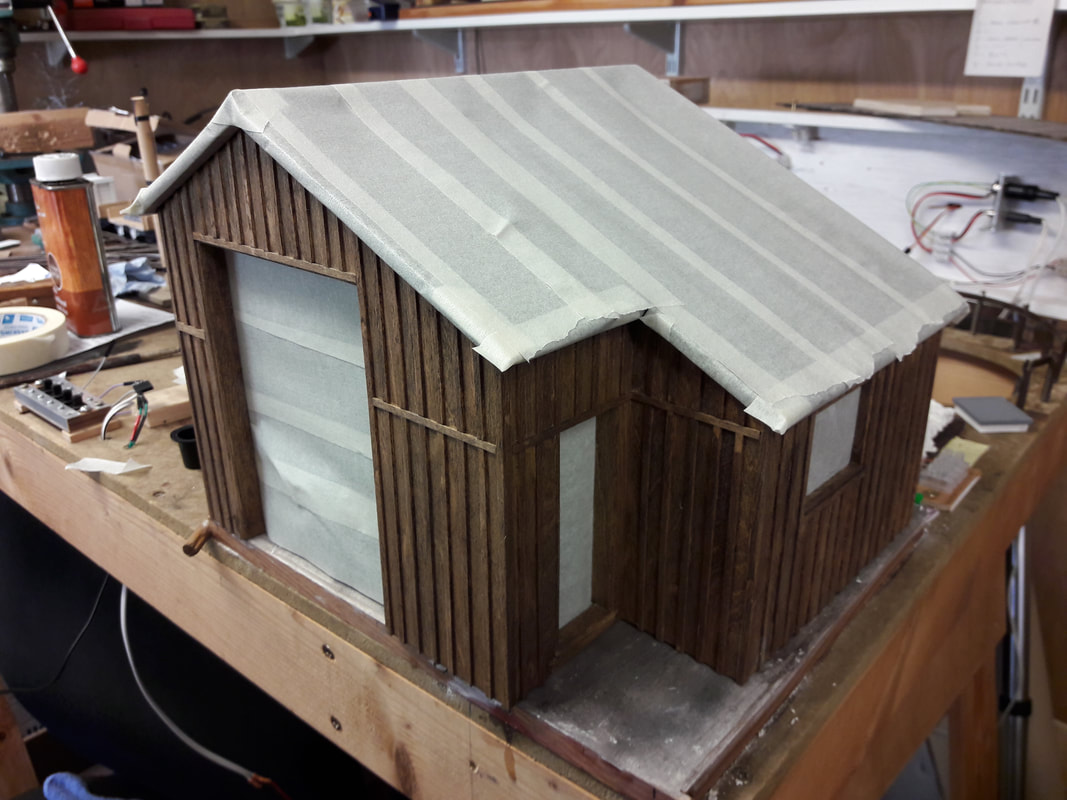
Following the completion of the new fence, it was decided to finish the engine shed external cladding in the same way. The first coat of dark oak stain has been added. It's not really big enough for a proper engine shed - it's more of an 'end-of-line' storage facility with a small working area.
|
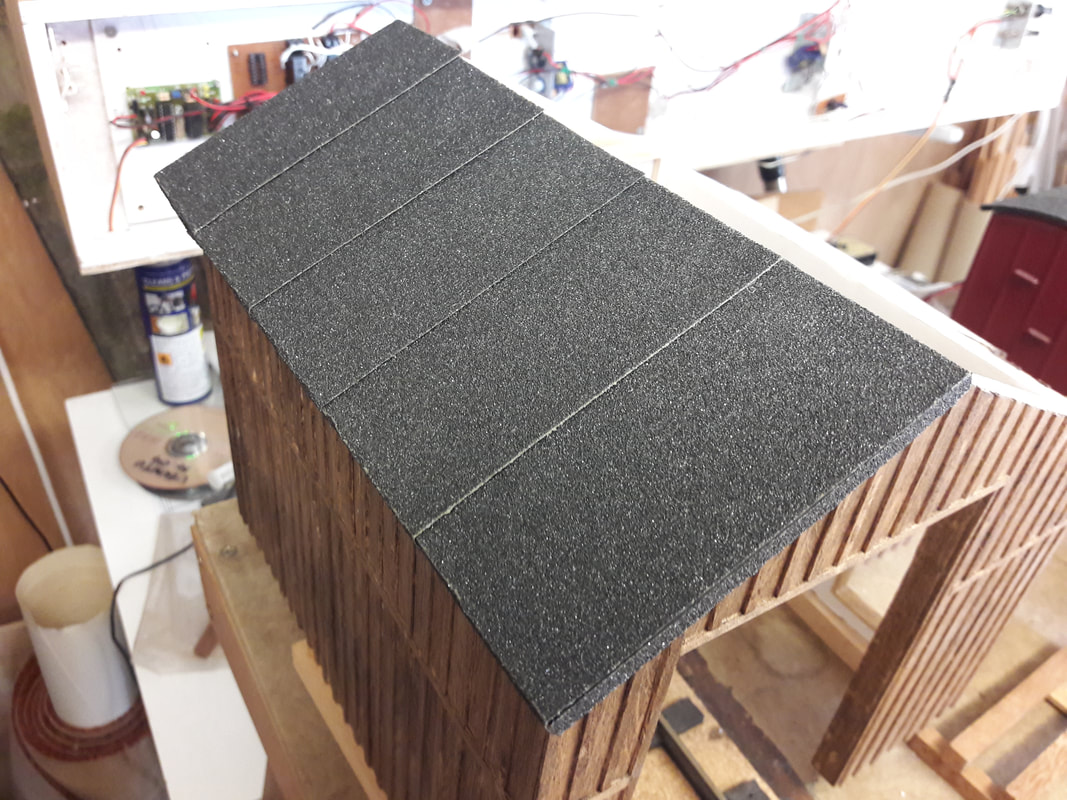
Double layers of the foamboard were used for the roof slopes. Corrugated roofing was the first choice, but I couldn't source a suitably sized sheet of a robust material. I decided against slates, but settled on 3 layer felt, in the form of medium coarse sand paper.
|
|
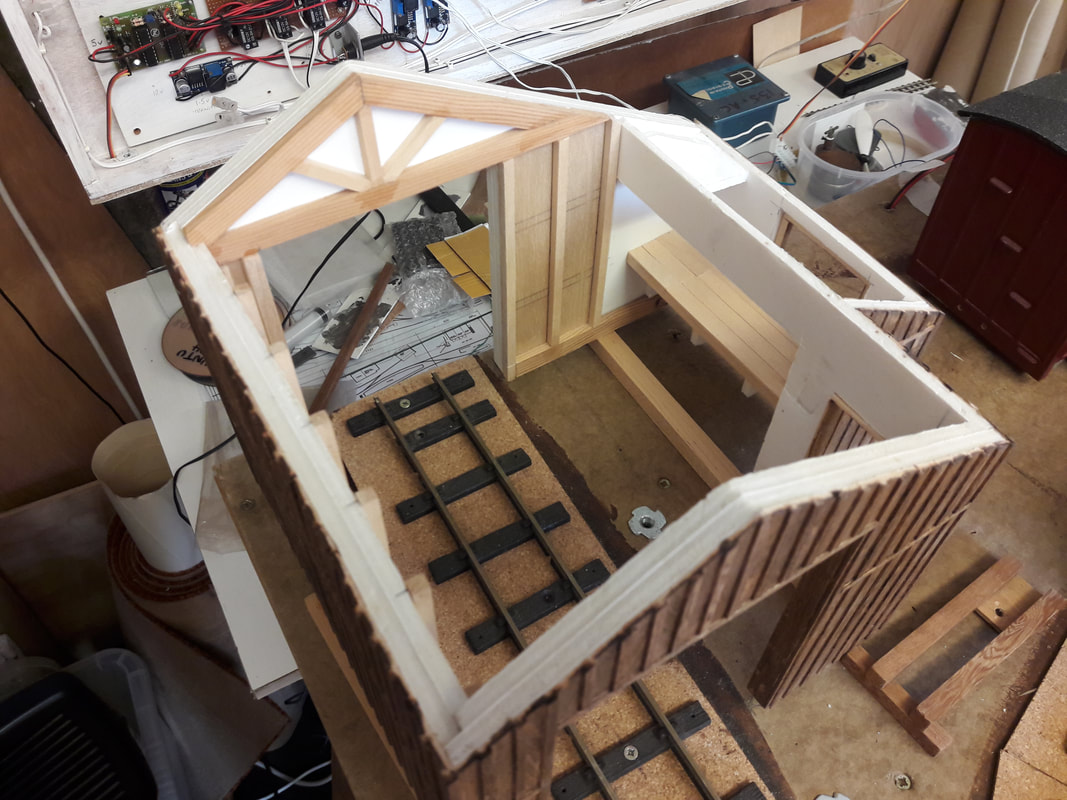
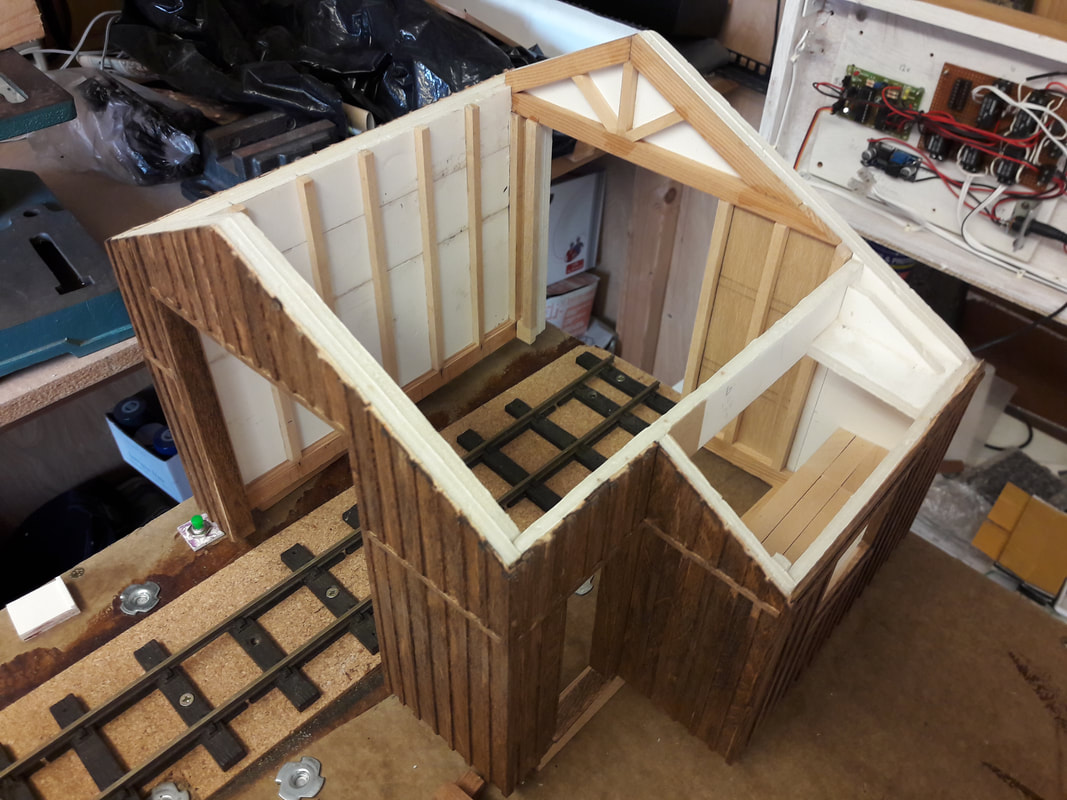
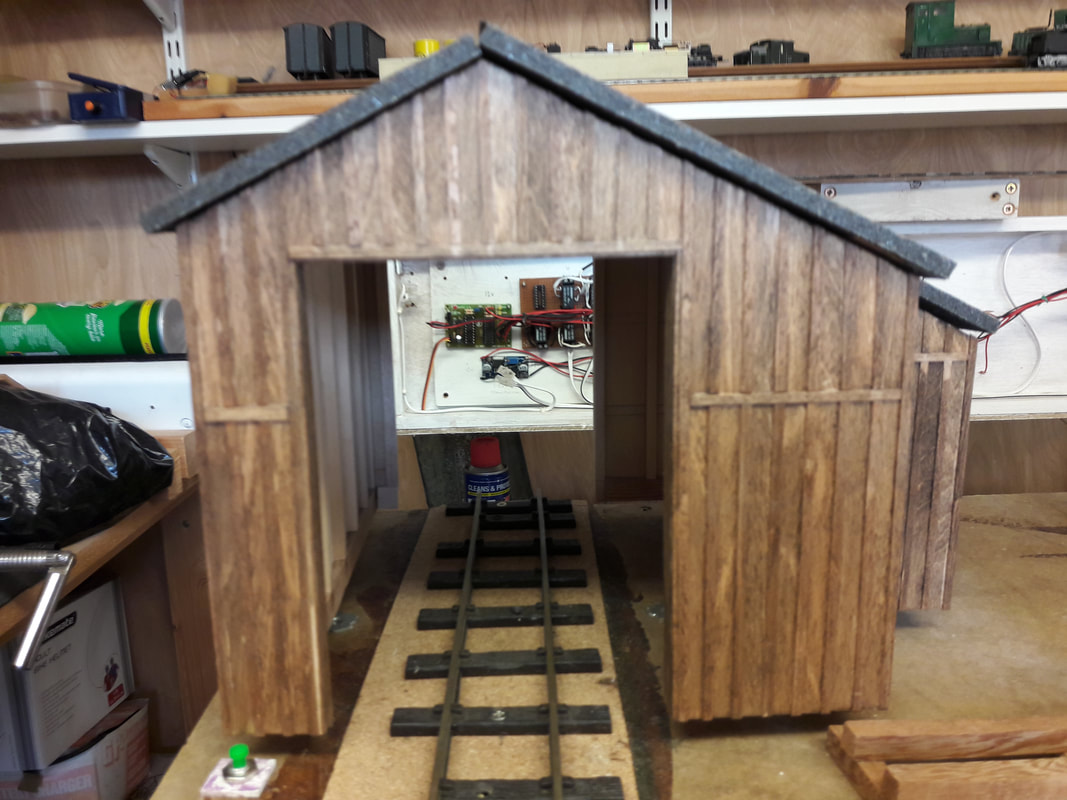
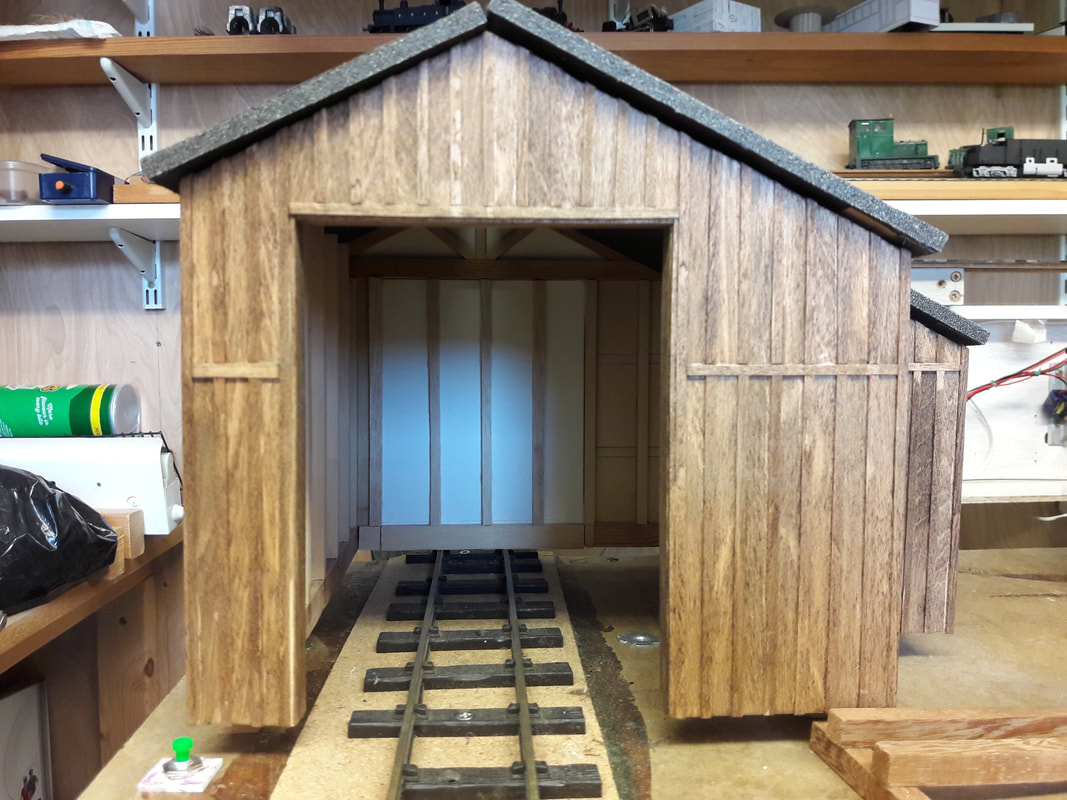
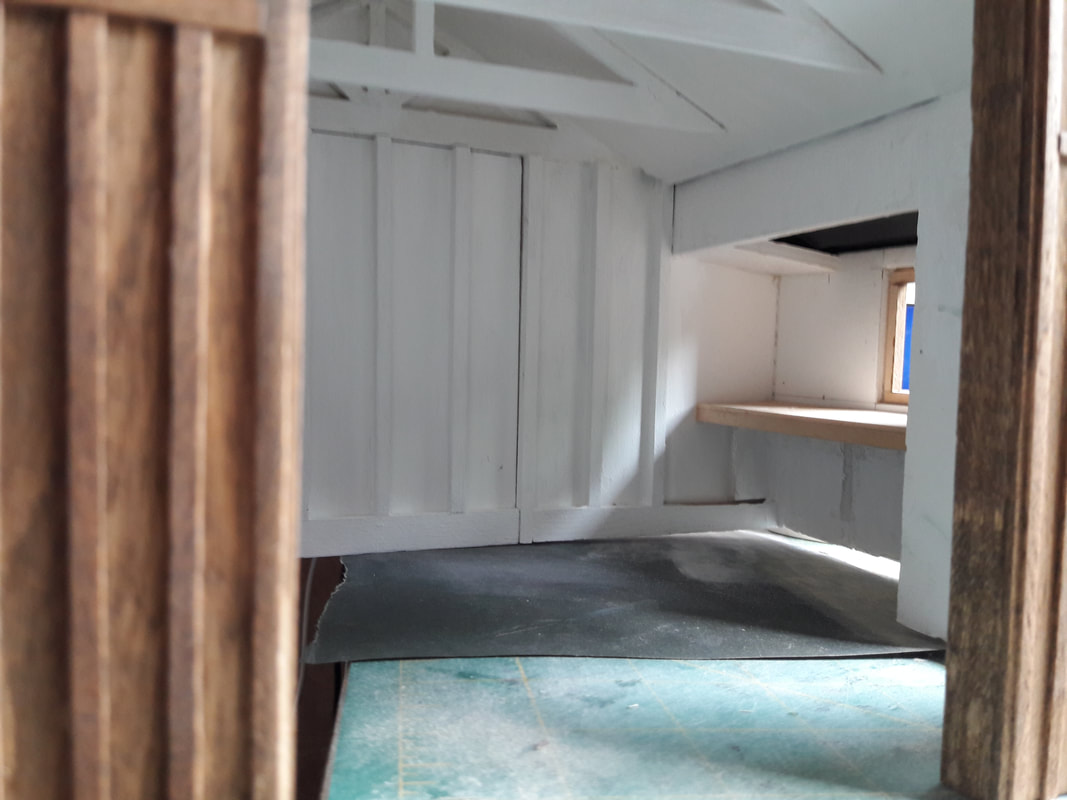
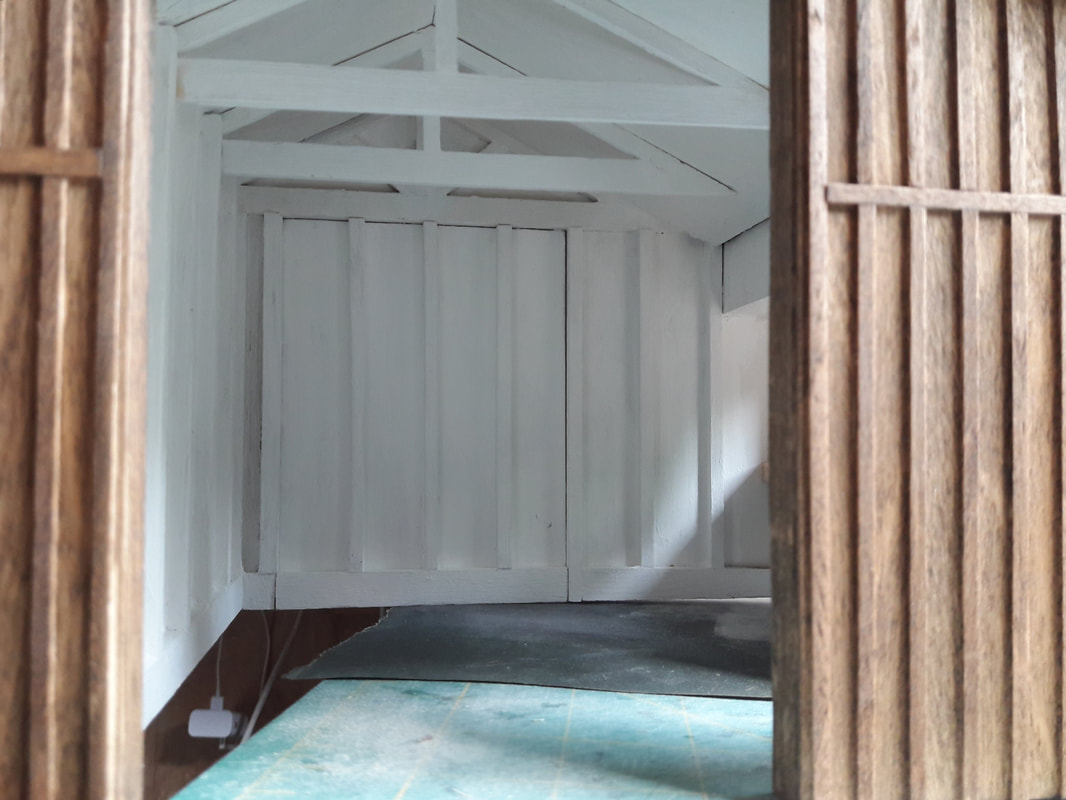
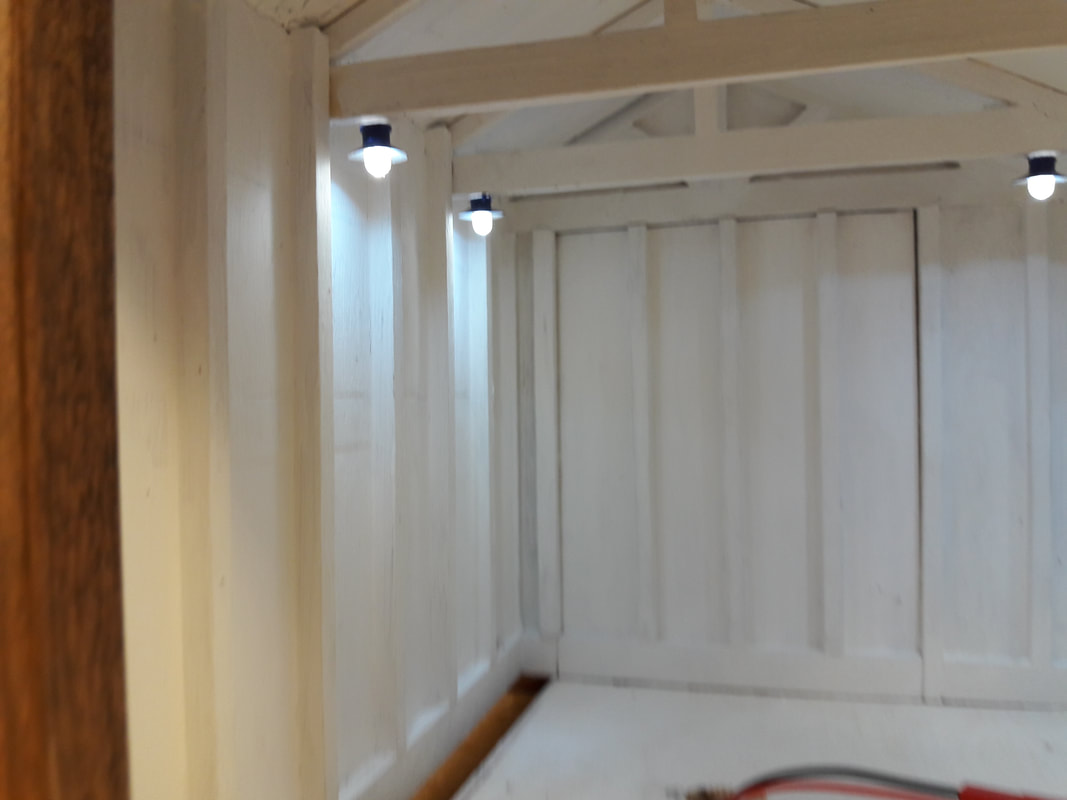
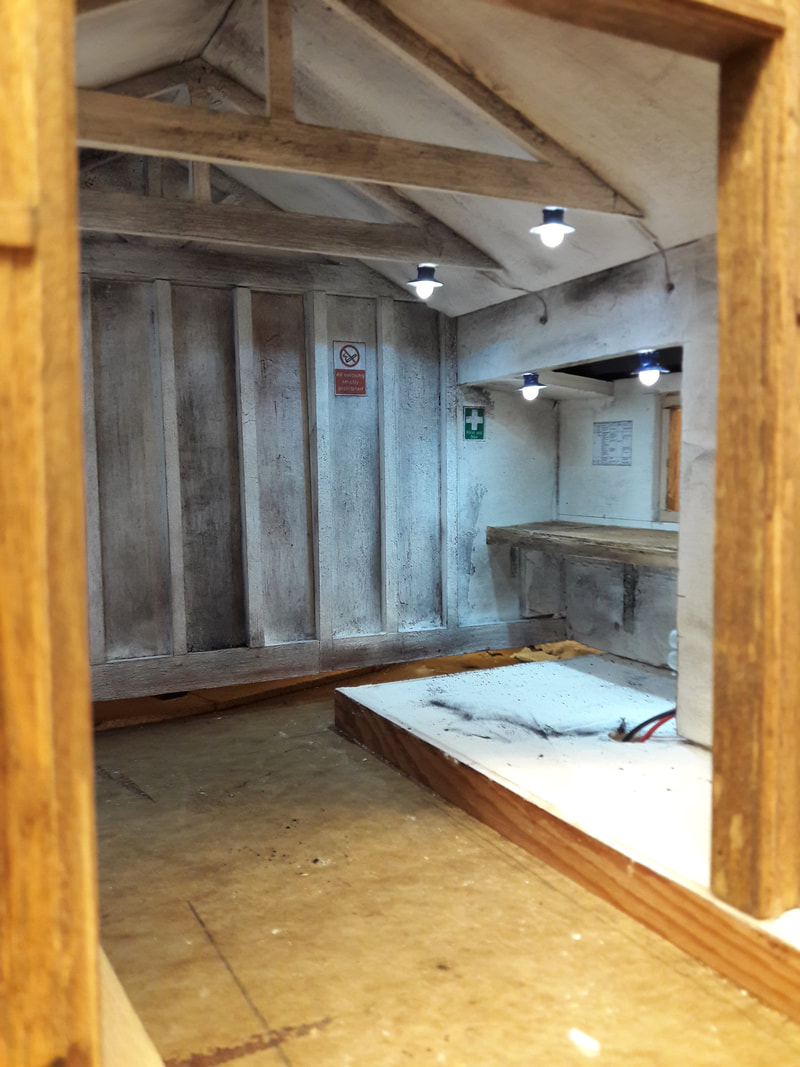
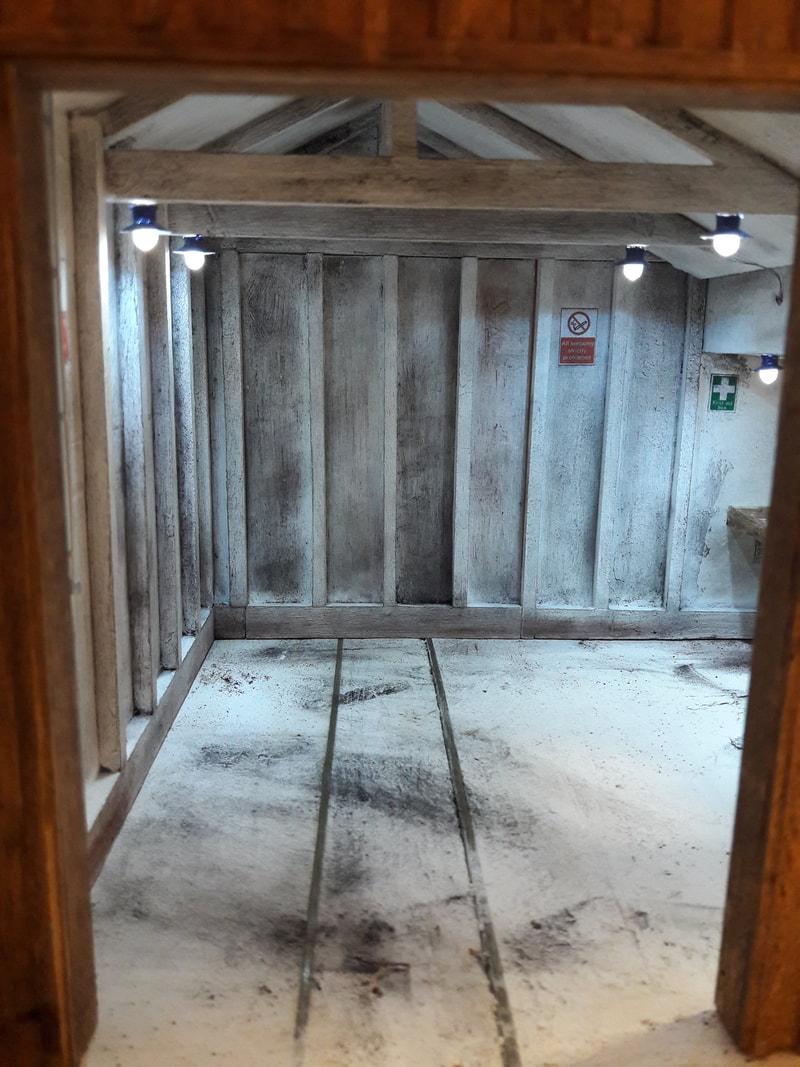
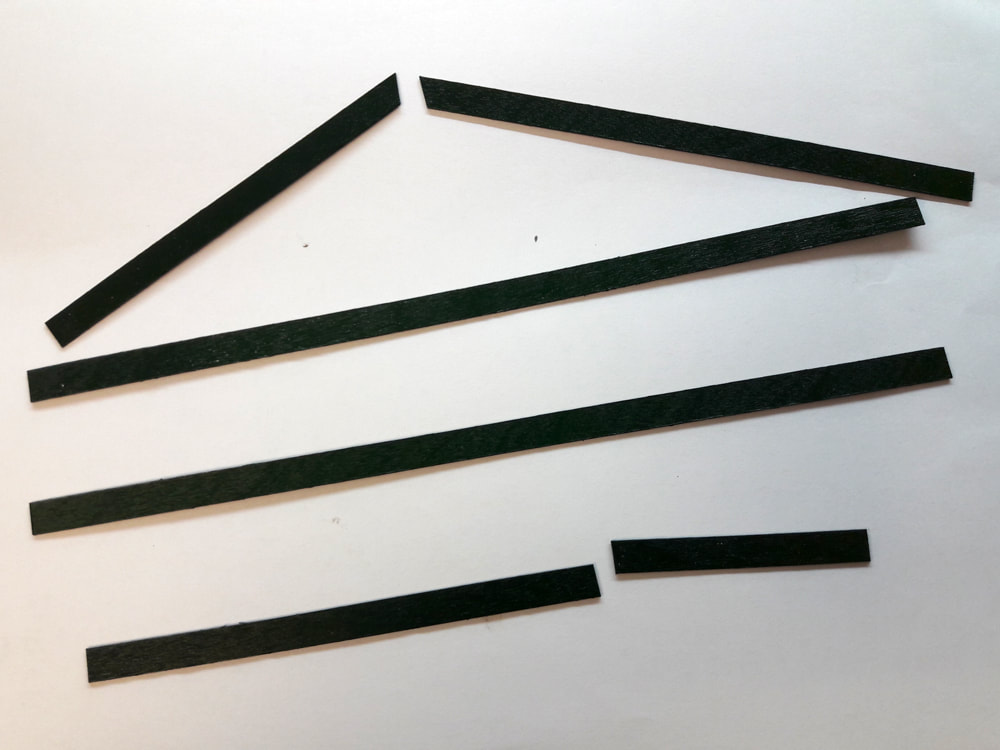
Two more roof trusses were added to match the one at the rear and the interior was painted white. Whilst most sheds are dark and dingy, I have definitely come across a few that (at least) started whitewashed. Grime can easily be added, and any white still visible should make viewing the interior easier.
|
A small bag of pear-shaped 6mm dia. lamps with just short pieces of wire sticking out were set-aside as candidates for the engine shed lighting, but these turned out to be 12v and barely glowed with the available 9v supply. 6 x 5mm dia. LED's were fitted with conical shades and installed. A dirty wash was applied to take the cold brightness out of the LED's.
|
|
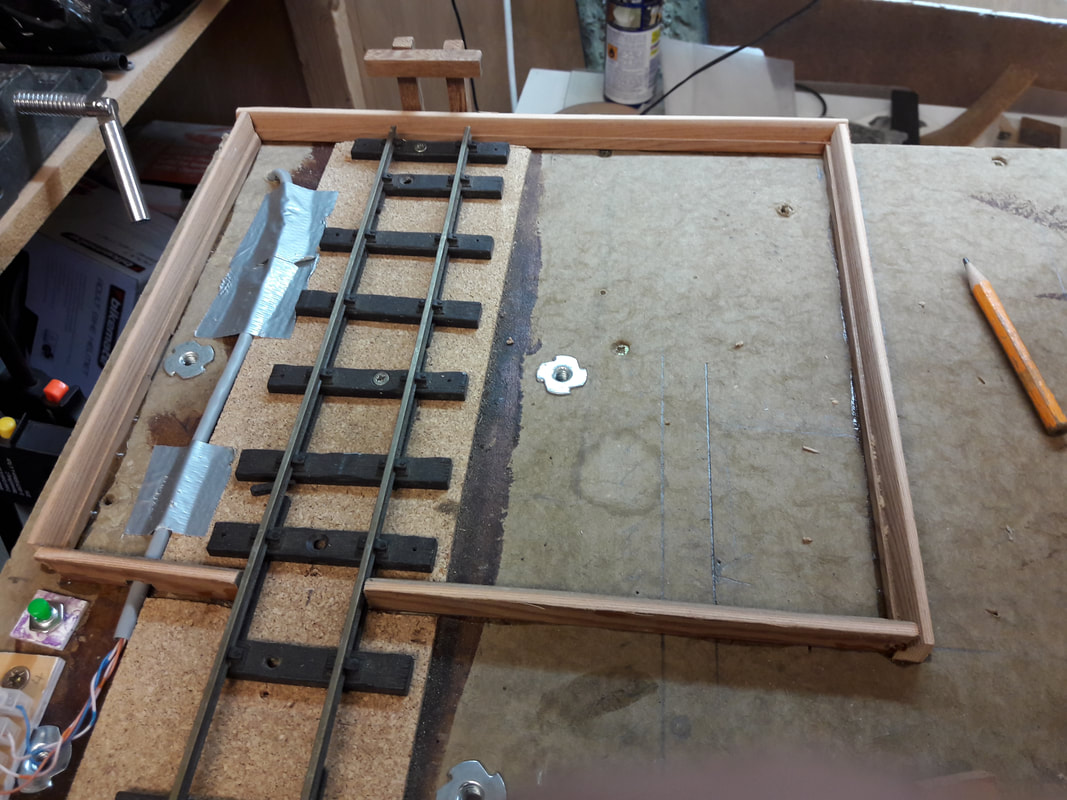
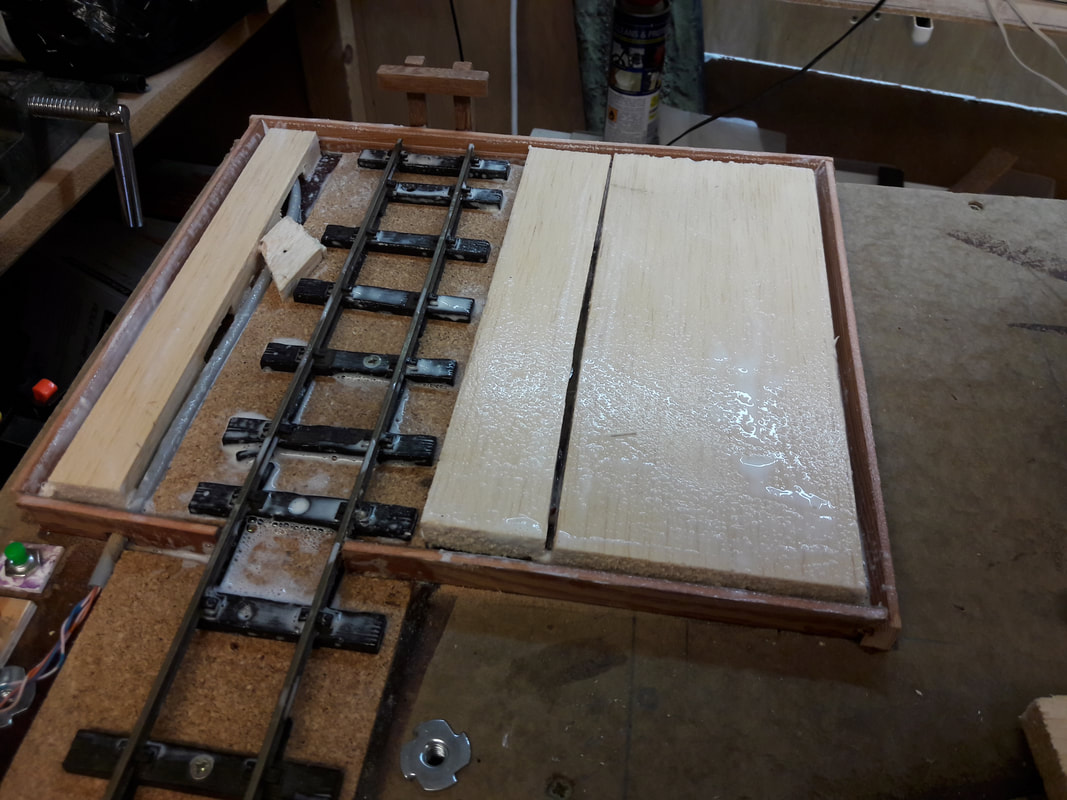
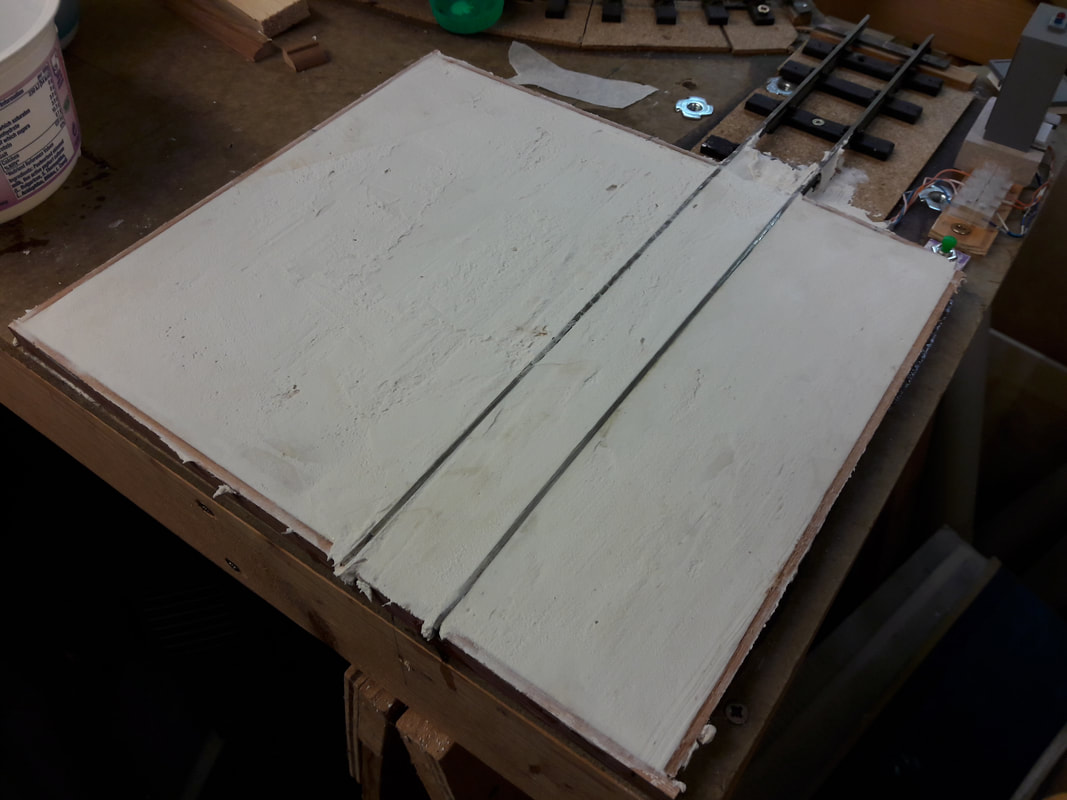
Envisaging the completed interior was difficult with a floor void comprising raw fibreboard and plastic track and so a base was created, just around the shed area. A timber frame at rail level was constructed to contain the area to be worked on. Some old balsa wood sheets were glued down to reduce the weight of the plaster to follow. Plaster was built-up in a few layers. The flange gaps will be cut-out in due course. This led to even more interior fittings and a few signs were added See Details.
|
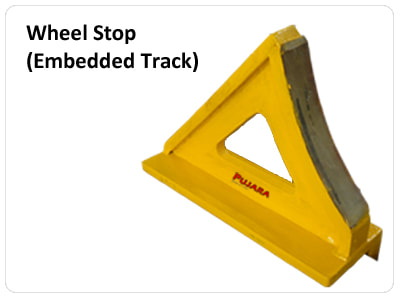
Last photo - The back wall is removeable to connect to a future fiddleyard (it made sense in the beginning), so a buffer would have to be part of the wall or be removeable. However, a knowledgeable friend advised that sheds often had steel wheel stops attached to the rails that stopped the wheels. Hopefully, the rail extensions won't attract too much attention.
|
|
|
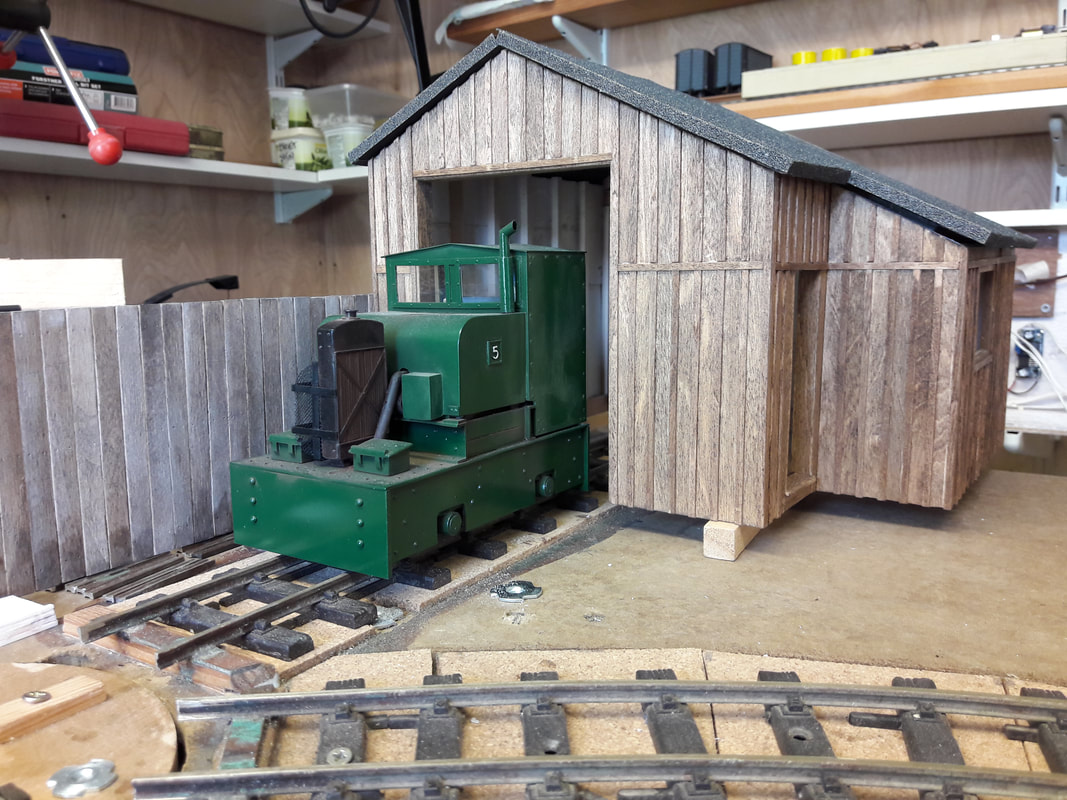
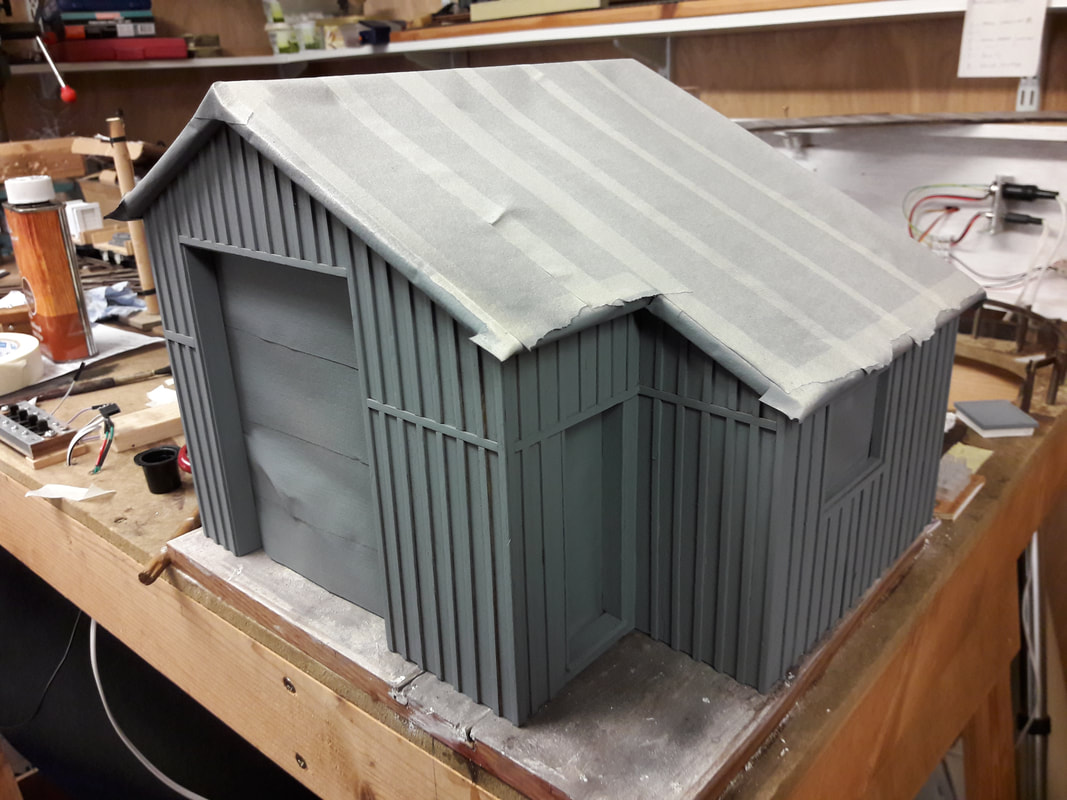
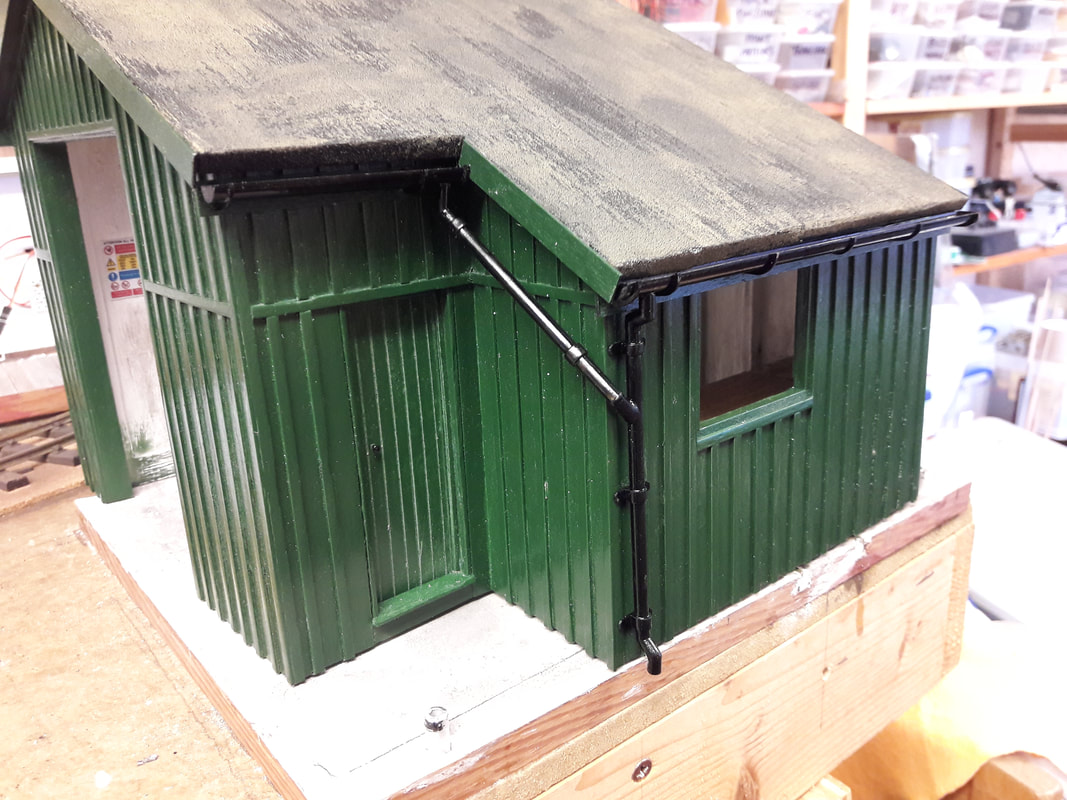
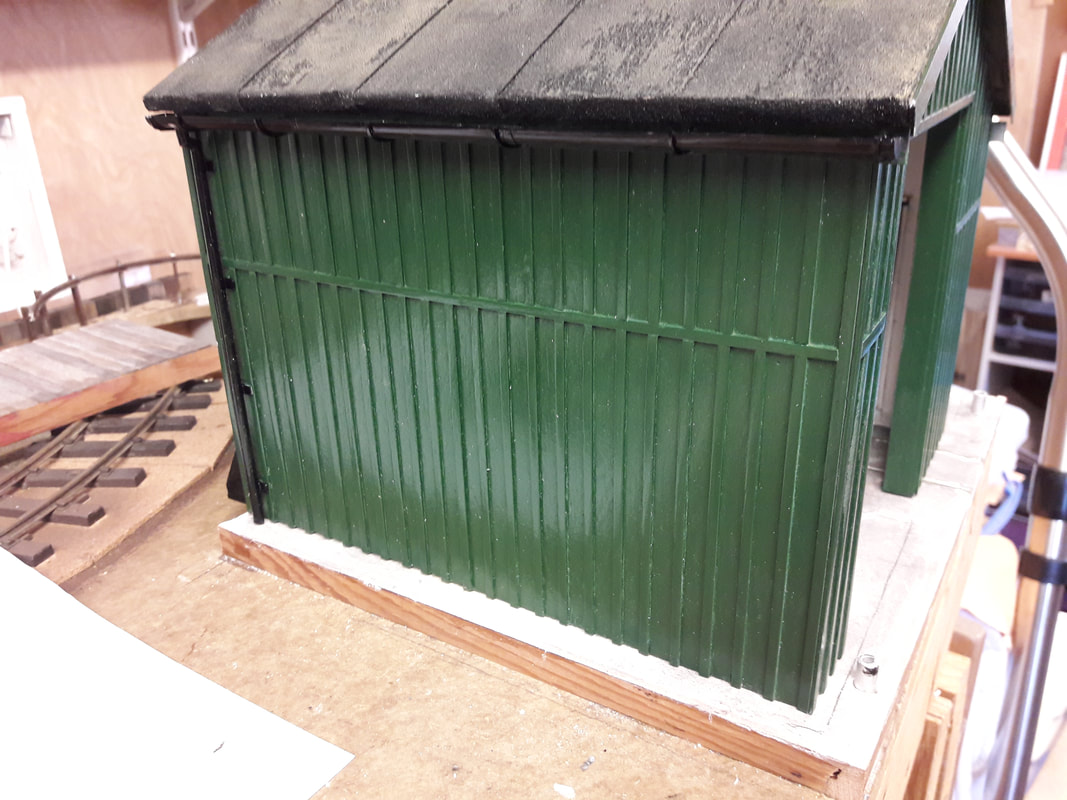
Although the stained timber cladding was attractive, there was something about it that didn't feel right. I had to decide whether to weather it, to match the fence, or paint it. It was a marginal decision with no going back. After another animated test, I had convinced myself to paint it. After grey primer it was finished with a coat of Halford's Ford Laurel green, the same as the Simplex. It's personal choice, but I like the new arrangement as it introduces something different.
As I had to buy a new can of paint, I was was also able to overspray the old blue-grey of Vinny's shed to to same colour as the Simplex. |
|
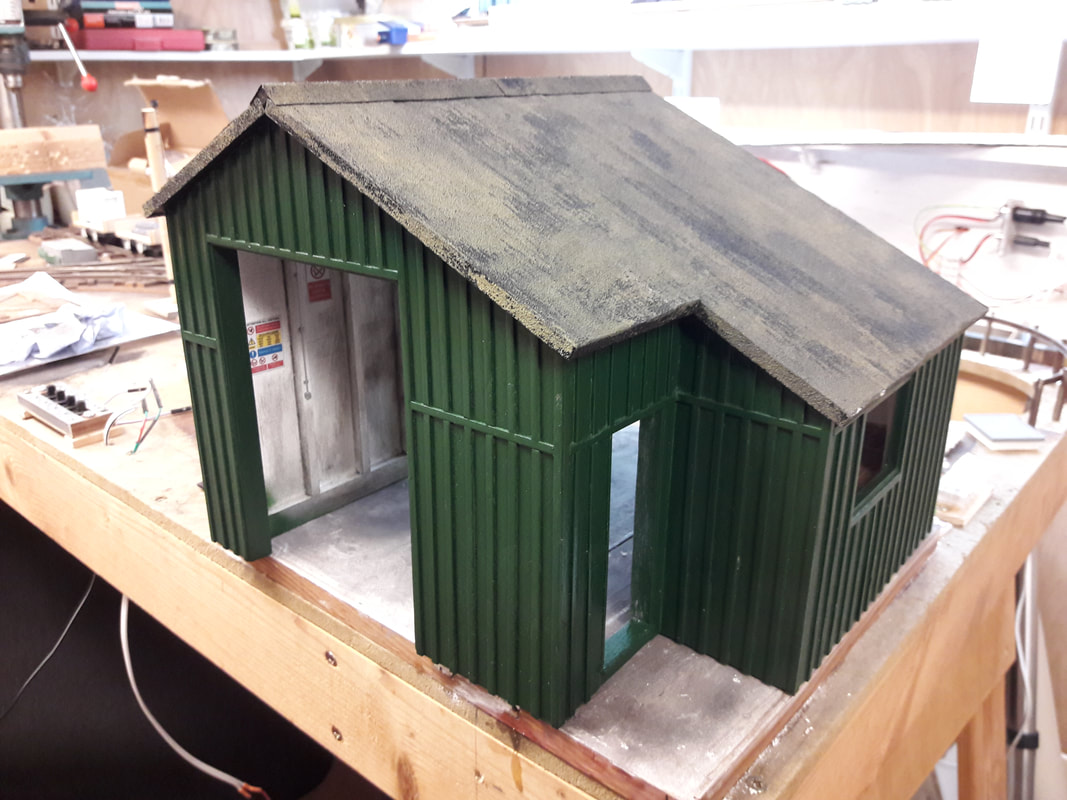
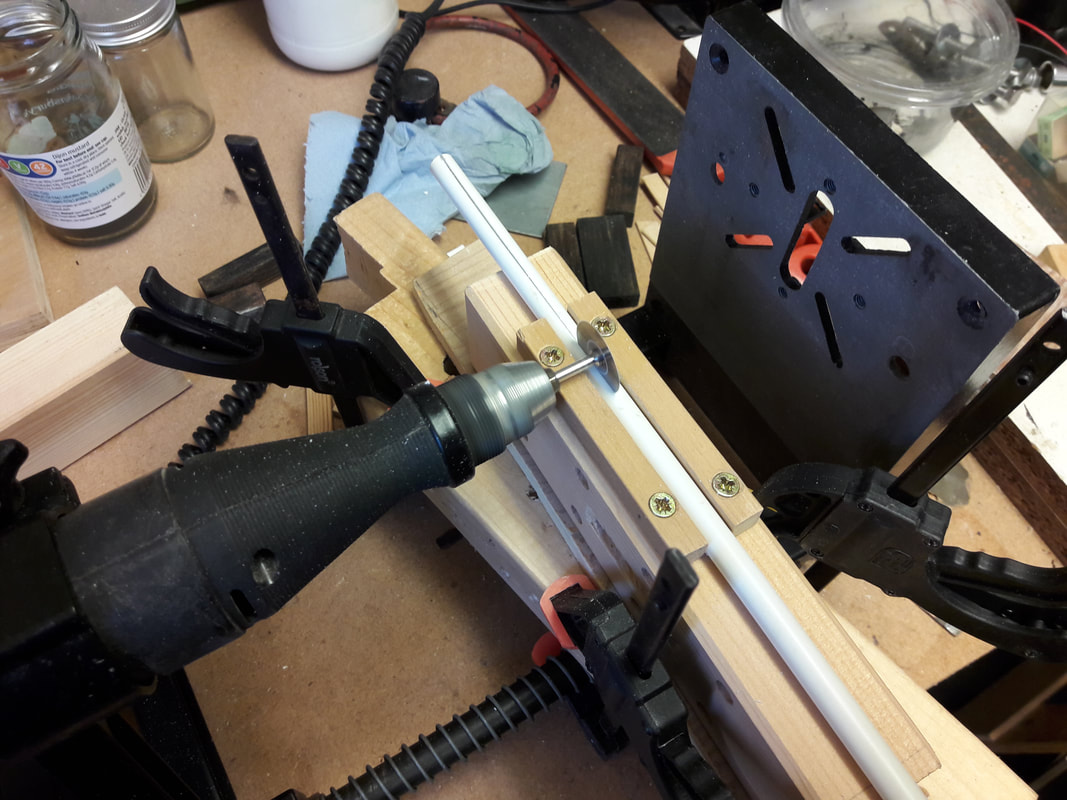
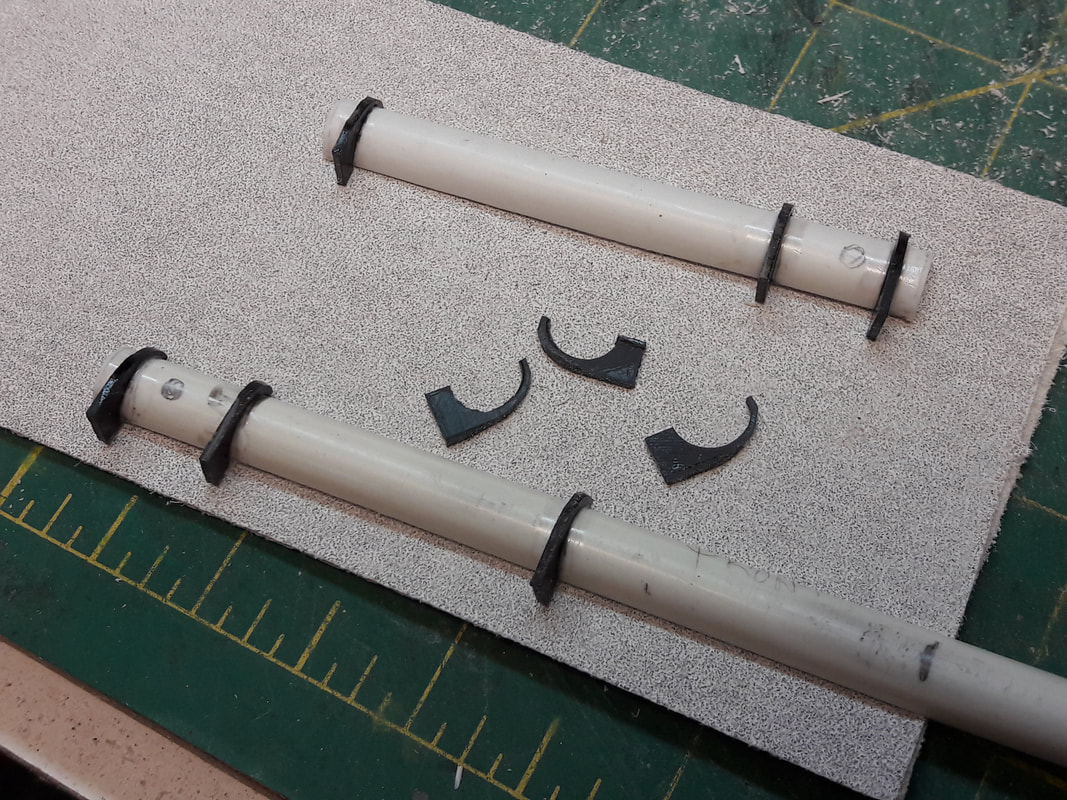
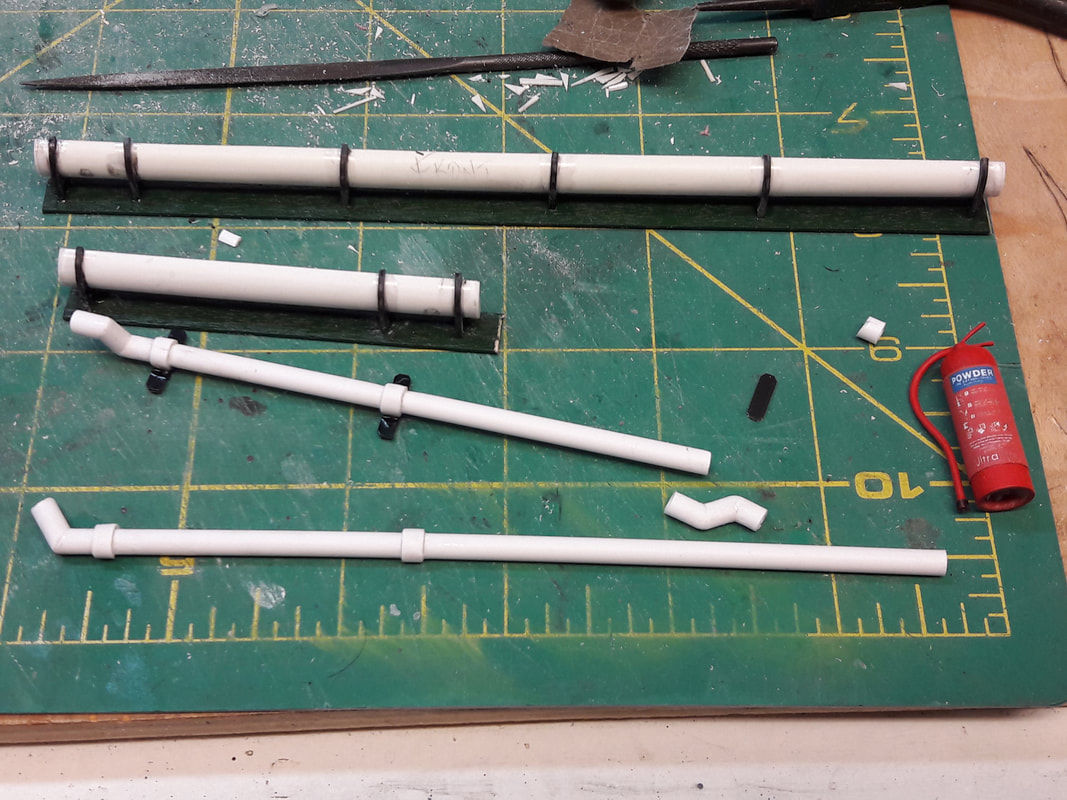
The roof had been 'designed' on the basis of a decent shed - gable fascia's but no gutters. However, I had added gutters to my shed/workshop so... Stripwood fascia's were made and painted. Then, having used some 8mm dia Evergreen plastic tube (scale 6") for the cans and extinguisher, gutters were soon added to the project. As half round sections weren't available, I had to work out how to slit the tube in half. Eventually, a 'lash-up' was created that sat on the up-turned mini-pillar-drill, fitted with a slitting saw blade. The tube was fed in by hand and, although it wasn't perfect, sufficient guttering was produced that only needed a minimum of filing and sanding to make presentable. Brackets were formed from flat sheet after drilling 8mm dia. holes.
|
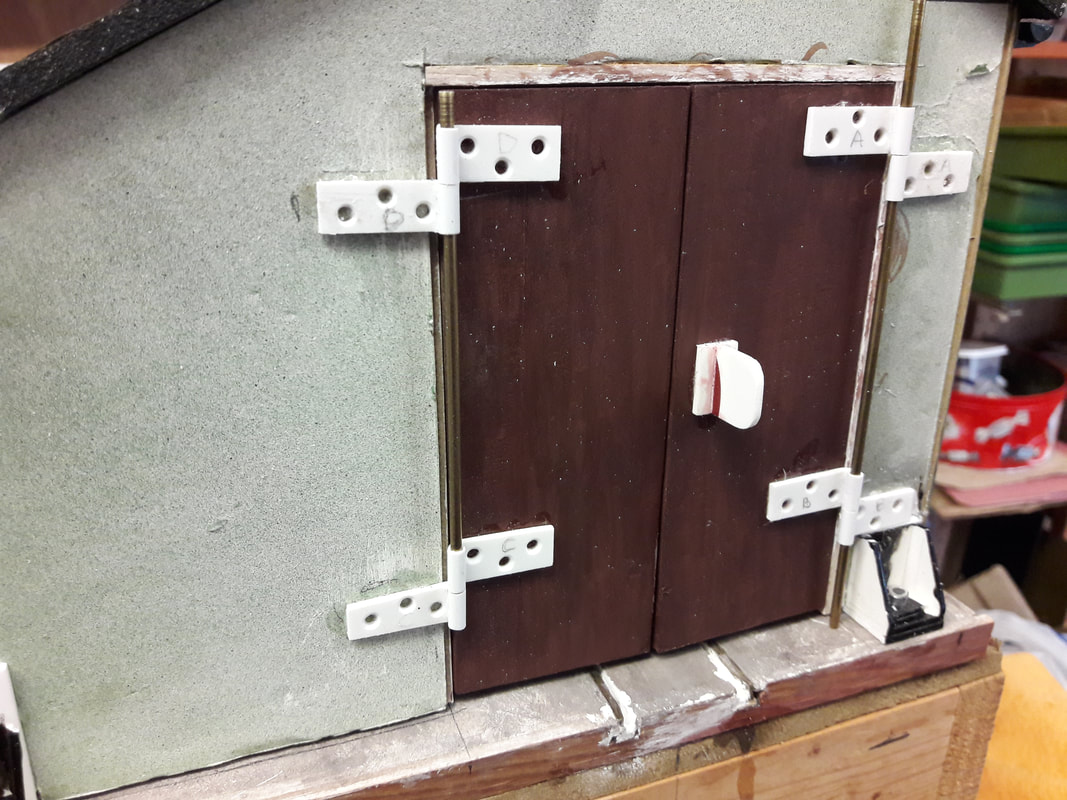
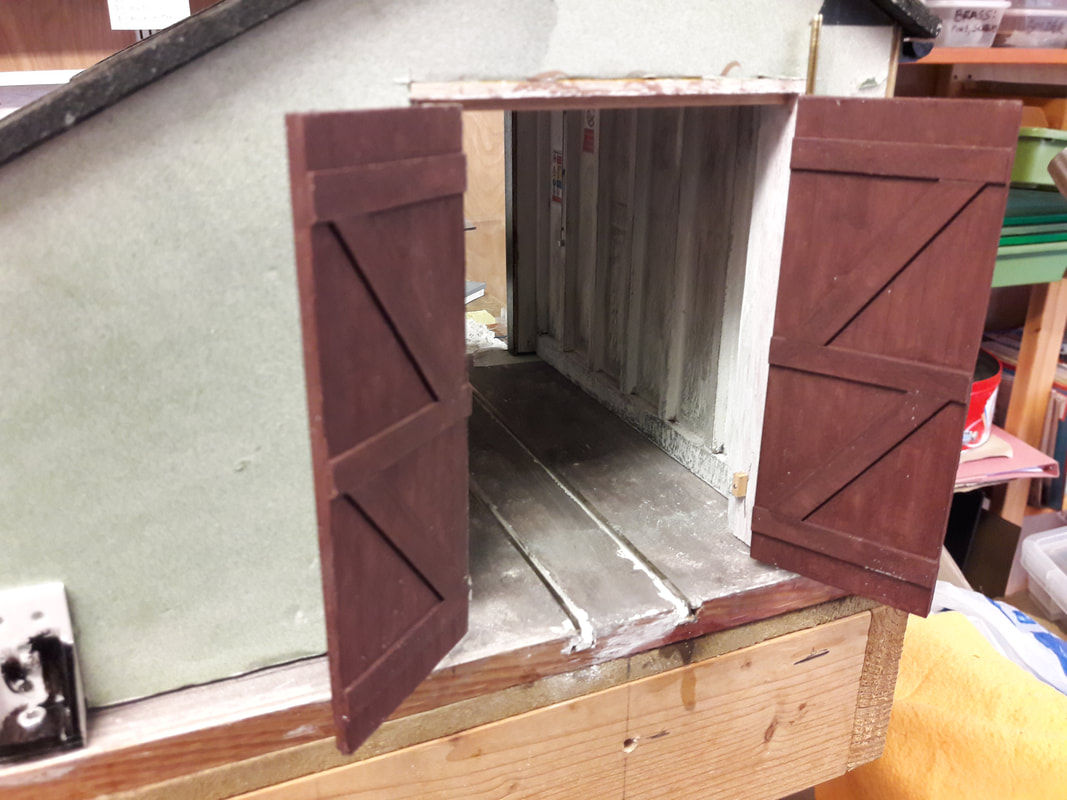
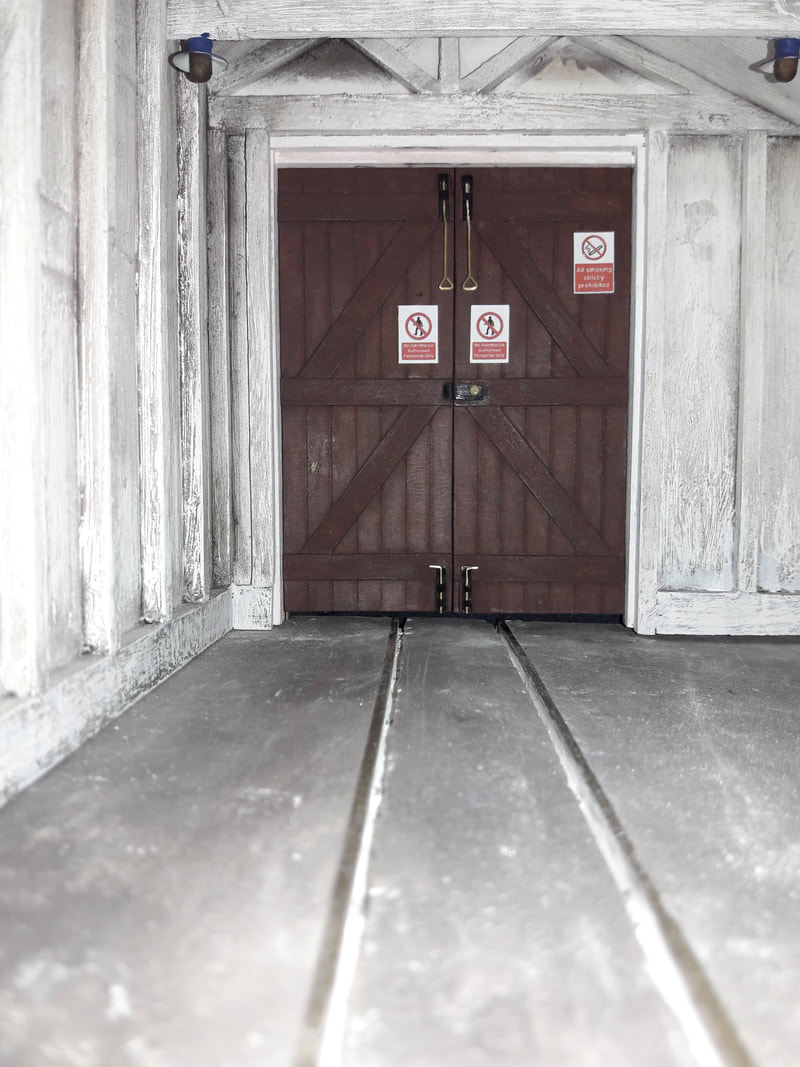
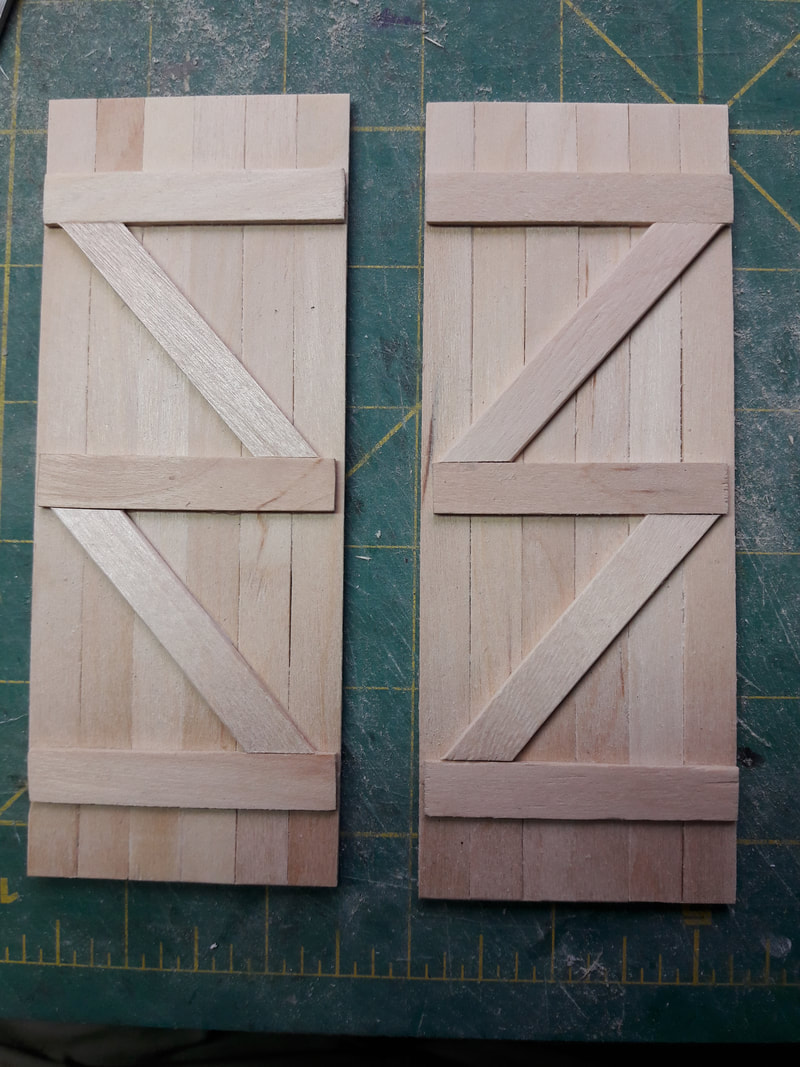
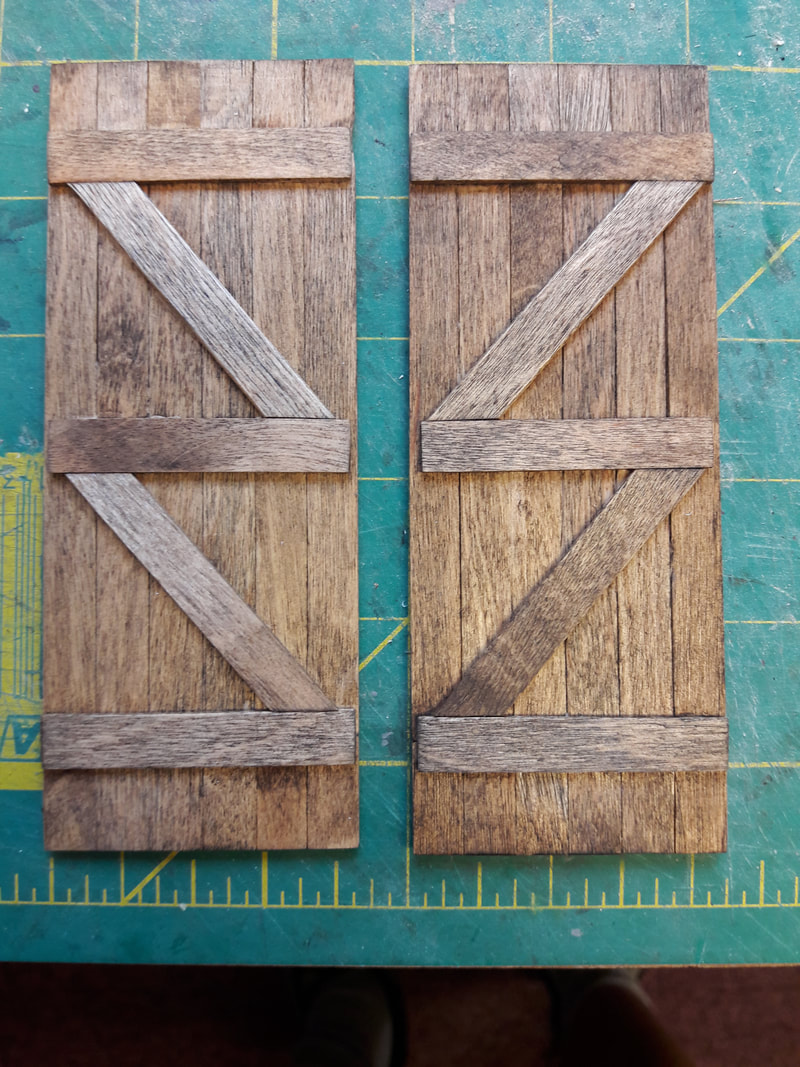
On some projects, you can go down a route and find you've gone the wrong way. The opening in the back of the shed was one example. It was created in case a rear fiddleyard became a reality in the future and a removeable wall panel created. One day, it dawned on me that there's rails going through the wall, but ignore them. Then, the panel which was a nice tight fit needs to be loosened for easy access, which then needs a secondary fixing to stop it falling out. Finally, when investigating real shed interiors, sheds with through tracks were discovered. The penny dropped and the removeable panel was dumped in favour of another pair of doors!
|
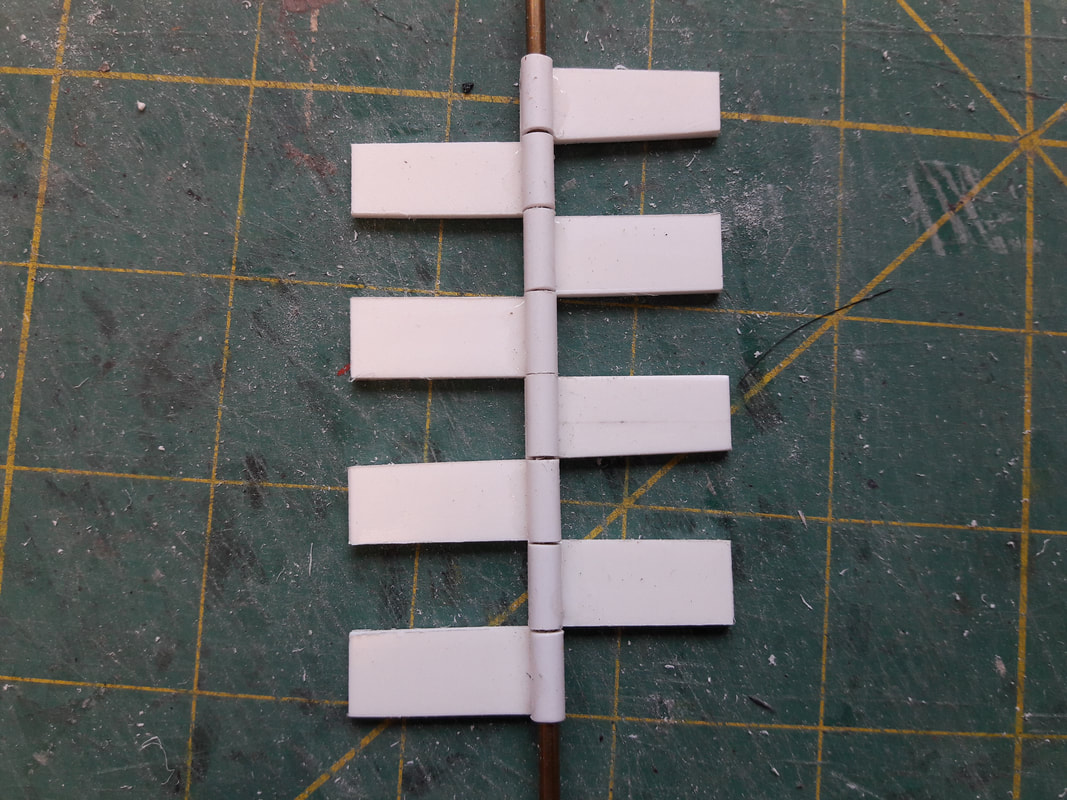
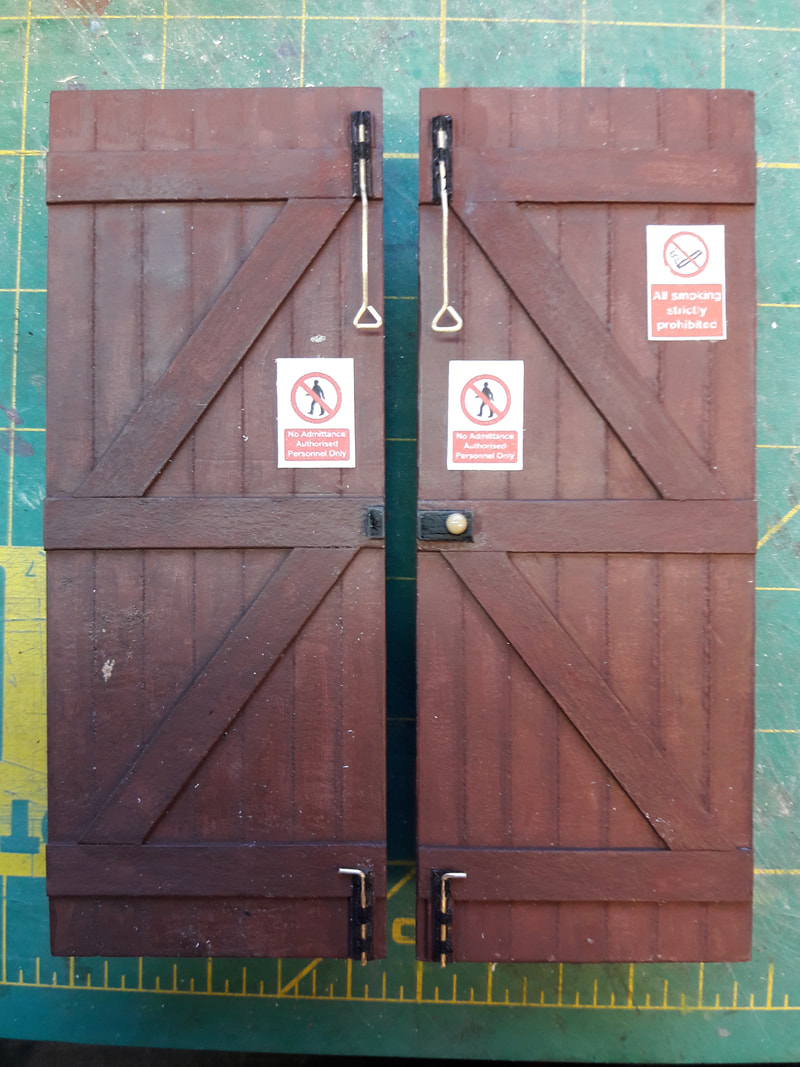
As they would only be viewed through the building, the pair of doors were made from layered card. The hinges would not be seen at all and so they were made from 2mm plastic sheet and 4mm plastic tube.
|